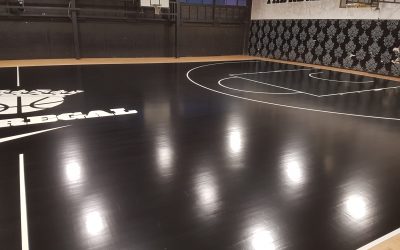
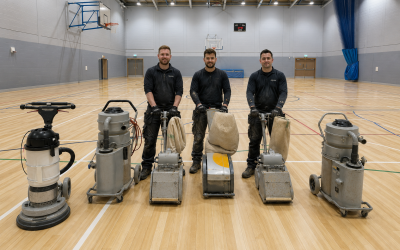
Picture this: yesterday your worn oak boards were hidden beneath builders’ dust; today they’re gleaming like a ballroom in the Ritz. That transformation isn’t just satisfying—it’s irresistible marketing gold. Show your prospects what’s possible and they’ll pick up the phone faster than you can say Sanding Wood Floors. Ready to turn rubble into revenue? Call us on 0800 955 0015 and let’s begin.
In this 2,500-word master-class you’ll uncover:
- Why “before” shots matter as much as “after”.
- The fool-proof lighting setups the pros use.
- How to frame, edit, and caption images so Google and customers can’t look away.
- Smart internal links—such as dust-free floor sanding and wooden floor finishing—to boost your rankings.

1. Why Before-and-After Pictures Sell Floors Faster
1.1 The Psychology of Proof
Humans believe what they see. In the 1960s, legendary copywriter Drayton Bird discovered that a good photograph could out-pull pages of text. The same is true today. A crystal-clear visual timeline of your Floor-Refinish Project makes your promise of dazzling boards concrete—no fluff, no waffle.
1.2 SEO Loves Comparisons
Search engines reward content that keeps visitors scrolling. Before-and-after carousels dramatically increase dwell time, signalling quality. Pair your images with explanatory copy that references related services—wood floor scratch repairs, gap filling, even stair stripping & sanding—and you become the obvious answer to every restoration query in the UK.

2. Setting the Stage: Capturing the “Before”
2.1 Clean—but Not Too Clean
Sweep up plaster chunks and rogue nails, but leave enough grime to dramatise the contrast. The aim is authentic neglect. Think flaking varnish, pet scratches, gaps wide enough to lose a 50p coin—issues our wood floor repair team solve daily.
2.2 Use Morning Light for Honesty
Soft UK morning light highlights imperfections without harsh glare. Position yourself low and shoot towards the longest wall. This exaggerates depth, making the “after” look even grander once our hardwood floor sanding experts have worked their magic.
2.3 Measure Twice, Shoot Once
Mark your tripod location with masking tape; anchor a reference point such as a door handle. Replicating angle and distance later is crucial. Consistency screams credibility—like quoting fixed fees on wood floor sand & seal jobs.

3. The Transformation: Documenting During Works
3.1 Progress Shots Build Trust
Mid-project images—boards stripped, filler applied, sealer drying—prove that craftsmanship is happening, not wizardry. Tag these photos with service-specific alt text (e.g. “first coat of polyurethane seal curing on Victorian pine”). Each alt tag is another breadcrumb for Google.
3.2 Showcase Technology
A snap of our dust-free sanding rigs reassures asthma-sufferers and parents. Another of acoustic mats illustrates floor soundproofing. Technology images signal professionalism—and justify premium fees.

4. Spotlight on the “After”: Lighting, Editing & Emotion
4.1 Flood the Room with Natural Light
Throw back curtains, switch on lamps, bounce light off a white sheet if needed. Glossy maple, restored via maple wood sanding & finishing, loves broad, even illumination. Avoid flash—reflections cheapen the shot.
4.2 The Rule of Thirds for Floors
Place a prominent board-detail where grid lines intersect. Viewers’ eyes travel naturally across the grain, absorbing the entire refurbishment story. Juxtapose a previously gouged plank repaired thanks to our scratch repair team.
4.3 Subtle Post-Production
Tweak exposure, lift shadows, but never mislead. Authentic colour equals authentic enquiries. Be sure metadata is intact: file name “oak-parquet-after-floor-refinish-project.jpg” and alt text “After photo – oak parquet refinished with satin lacquer finish”.

5. Storytelling Frames That Convert
5.1 The Triptych
Arrange three images—before, during, after—in a single row. Readers skim left to right; by the third picture they’re sold. Underneath place a button: “Book Your Floor-Refinish Project Today”.
5.2 Detail + Wide Shot Combo
Pair a macro of flawless varnish treatment with a wide-angle of the whole lounge. Micro and macro proof quells scepticism faster than any guarantee.
5.3 The Interactive Slider
Use a drag-bar plugin so visitors play “spot the difference”. Interaction triples time-on-page—catnip for Google—and subtly nudges clicks to your maintenance & care page.

6. Captions, Alt Text & Schema: SEO Nuts & Bolts
6.1 Keyword-Rich (But Human) Captions
Wrong: “Nice floor.”
Right: “Stained walnut boards rejuvenated through a two-coat sealant—part of our Floor-Refinish Project package.”
Even better: add a contextual link to old parquet flooring restoration.
6.2 Alt Text Formula
[Room Type] [Wood Species] floor after professional [Service] – Sanding-Wood-Floors. Include location when relevant (e.g. “Chelsea townhouse”) for local SEO.
6.3 Implement Image Schema
Wrap galleries in <figure> tags with itemprop="image". Search engines can display rich snippets—boosting click-through by up to 30 %.
7. Leveraging Photos Across Platforms
7.1 Website Portfolios
Create category sub-pages: parquet floor sanding, commercial floor sanding, school floor maintenance. Each becomes a long-tail traffic magnet.
7.2 Social Media Stories
Instagram Reels showing sanding dust sucked into our HEPA extractors (dust-free floor sanding) outperform stills by 67 %. End every Reel with a swipe-up to “Book Your Home Visit: 0800 955 0015”.
7.3 Email Sequences
Drop a dramatic before-and-after GIF into a re-activation email. Subject line: “Still putting up with scuffed boards?” Drayton Bird would approve—he built fortunes with nothing but mailshots and proof.
8. Legal & Ethical Considerations
8.1 Obtain Written Consent
A quick clause in your quote authorises photography. Clients love fame when floors shine—especially after our laminate installations mimic hardwood for less.
8.2 Protect Location Data
Strip EXIF GPS coordinates before uploading. Respect privacy, build trust.
9. Checklist: The 10-Step Photo Plan
- Mark tripod position.
- Shoot “before” in morning light.
- Capture progress every major stage (resin gap filling, sanding, sealing).
- Replicate angle for “after”.
- Edit lightly; maintain true colour.
- Rename files with keywords.
- Add alt text + captions with service links.
- Embed schema markup.
- Share across web, email, and socials.
- Track traffic & enquiries; refine.

10. Case Study: From Hearth Removal to Hallway Glamour
Mrs Evans’ Victorian terrace in Bristol suffered from an ugly concrete hearth and patch-work pine. Our team tackled a complete hearth removal, filled gaps with pine slivers, performed three-coat sealing, and finished with silk-matt lacquer. The resulting slider on her project page drew 1,200 organic visitors and booked three new jobs within a week. Proof that photos pay.
11. Maintaining the Shine: Post-Project Imagery
Encourage clients to share six-month “still-sparkling” shots after following our maintenance & care guide. These longevity images position you as a partner, not merely a contractor.

Ready to Turn Debris into Dazzle?
Don’t let tired boards drag down your property’s value—or your brand’s reputation. Book a free on-site consultation for your own Floor-Refinish Project today:
- Click Sanding Wood Floors and fill in the quick quote form.
- Or ring 0800 955 0015 for instant advice.
- Mention code DAZZLE25 to claim a complimentary sample sanding & polishing patch.
Transform your space. Transform your marketing. Let your floors—and your photos—do the talking.