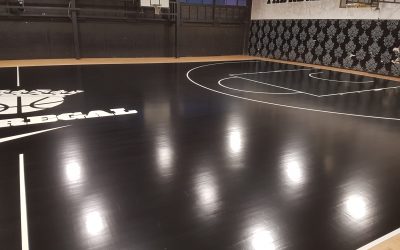
Painting wood floors is an excellent way to rejuvenate your floors, adding both character and protection to the surface. Whether you’re aiming for a rustic charm or a sleek modern look, a fresh coat of paint can transform any room.
In this guide, we will learn the step-by-step process to paint wood floors, from preparation to finishing touches, ensuring a durable and attractive finish. Read on to learn more about how this DIY process can do wonders for your floors!
9 Easy Steps To Paint Wood Floors
1. Prepare The Room
The first step is to start by removing all furniture, rugs, and decor from the room to ensure an unobstructed workspace. Sweep, vacuum, and mop the floor thoroughly to eliminate dust, dirt, and debris. This clean surface is crucial for achieving a smooth, long-lasting finish. Allow the floor to dry completely before proceeding.
2. Sand The Floor

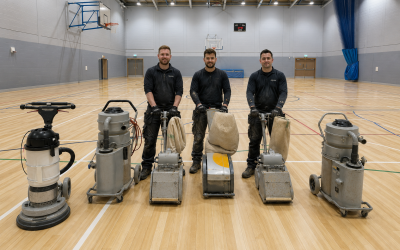
Once the floor is ready to work on, lightly sand the entire floor with 150-grit sandpaper to create a rough surface for the primer and paint to adhere to. Focus on achieving an even texture without deeply scratching the wood. Remember to wear safety gear essentials like a dust mask and safety goggles to protect yourself from dust and debris while sanding wood floors. After sanding, clean the floor thoroughly with a tack cloth or a damp cloth to remove all sanding dust.
3. Apply Painter’s Tape
Apply painter’s tape along the edges of the room to protect baseboards, door frames, and any areas you do not want to paint. Ensure the tape is firmly pressed down to prevent paint from seeping underneath. This step will help create clean, professional-looking lines once the painting is complete.
4. Prime Your Floor
Before you actually start painting, you will need to cover the surface with primer. Using a paint brush for edges and a roller for larger areas, apply a coat of primer to the floor. The primer seals the wood and provides a stable base for the paint, enhancing adhesion and durability. Let the primer dry completely, following the manufacturer’s recommended drying time.
5. Paint The Floor

Using the same method as priming, start painting the floor using a brush and roller. Begin by painting the edges of the floor with a brush, then use a roller for the main areas. Apply the first coat evenly, working in small sections to maintain a wet edge and prevent lap marks. Allow the paint to dry completely, typically 24 hours, before assessing if additional coats are needed.
6. Sand Between The Coats (Optional)
For a smoother finish, lightly sand the floor between coats of paint. Use fine-grit sandpaper to gently buff out any imperfections or raised grain. Clean the floor thoroughly with a tack cloth to remove all dust particles before applying the next coat of paint. This step is optional, but experts recommend it for a flawless result.
7. Apply Additional Coats
Apply a second coat of paint, following the same method as the first. Ensure even coverage and address any areas that appear thin or streaky. Depending on the desired finish and coverage, you may need a third coat. Allow each coat to dry fully before applying the next.
8. Seal The Floor (Optional)
For enhanced durability, especially in high-traffic areas, apply a clear polyurethane sealer over the painted floor. Use a paint brush or roller to evenly distribute the sealer, ensuring complete coverage. This step provides extra protection against scratches and wear. Follow the manufacturer’s instructions for drying and curing times.
9. Remove The Painter Tapes And Cure Until Dry
Carefully remove the painter’s tape once the final coat of paint or sealer is dry to avoid peeling the paint. Allow the paint to cure for at least a few days, ideally a week, before moving furniture back into the room. During this period, be gentle with the floor to prevent damage and ensure a long-lasting finish.
Additional Tips While Painting The Wood Floors

- Ensure the room is well-ventilated during the painting process to help the paint dry and to reduce fumes.
- Always test paint on a small, hidden area of the floor to ensure you like the colour and finish.
- Clean painted floors with gentle, non-abrasive cleaners to maintain the paint.
Conclusion
Painting wood floors indeed increases the lifespan of wood floors and makes them look more aesthetic. Proper preparation, including thorough cleaning and sanding, ensures the paint adheres well and lasts longer.
Sanding wood floors is particularly useful as it creates a rough texture that enhances the bonding of primer and paint, leading to a more durable and professional finish. While DIY sanding can achieve good results, professional sanding often provides more safety with a uniform and smoother surface, further ensuring the longevity and quality of the painted floor.
By following the detailed steps and allowing adequate drying and curing times, you can achieve a beautiful, long-lasting painted floor that will enhance the character and style of your home for years to come.
FAQs
Q.1 Is painting wood floors a good idea?
⇒ While many homeowners choose to stain or refinish wood floors, painting them can be a simpler process that also extends the life of the flooring.
Q.2 Can you paint a wood floor without sanding?
⇒ It’s possible, but not recommended. Sanding ensures better paint adhesion and a smoother finish, resulting in a more durable and professional look.
Q.3 How many coats of paint on a wood floor?
⇒ Typically, two coats of paint are sufficient for good coverage and durability, though a third coat may be needed for darker colours or higher traffic areas.