If you’ve ever finished a room, stood back, and thought, “Why does my lovely floor now look like a pond full of midges?”—this is for you.
I’m going to show you exactly what to do (and what to never do) when applying varnish to wood floors so you end up with a clear, even, tough finish—minus bubbles, streaks, or that sticky, dusty nightmare that ruins weekends and relationships.
And because results beat theory, I’ll also give you a simple, repeatable plan—what I call the “No-Drama Varnish Method”—used every week by the team at Sanding Wood Floors. If you’d rather a trusted pro handle the whole job, tap to call us on 0800 955 0015.
While we’re here, if your boards still need prep, you’ll get the fastest results by booking dust-free floor sanding with a proper wood floor sand & seal. Want a different sheen or tone? See our wooden floor finishing options and floor finishes & seals.
What this guide gives you
- A plain-English checklist you can follow today
- The exact room conditions pros aim for (temperature, humidity, airflow)
- Grit sequences that leave edges and centres the same
- How to choose applicators (and when a roller ruins everything)
- The correct coat thickness, timing and “denib” technique between coats
- Troubleshooting: bubbles, lap marks, white haze, peel, dust nibs
- Sensible aftercare that saves you money
If at any point you think, “I’d rather not spend my Saturday on my hands and knees,” call 0800 955 0015 and our team will sort it. We handle everything from hardwood floor sanding and parquet floor sanding to floor restoration and gap filling.
The No-Drama Varnish Method (overview)
Big idea: Flawless varnish isn’t about “great brushing.” It’s about discipline—clean prep, right product, thin even coats, and leaving it alone.
- Prepare properly: flat, clean, dust-free, repairs done, gaps filled.
- Control the room: 18–22°C, moderate humidity, steady airflow (but no draft).
- Choose the right varnish: water-borne poly for most homes; high-traffic versions for kitchens/halls; oil-modified for richer warmth (with longer cure).
- Apply thin, even coats with a good microfibre applicator or T-bar; keep a wet edge.
- Allow correct recoat times; denib lightly between coats.
- Respect cure time before rugs, heavy furniture or mopping.
If you need repairs first—broken blocks, loose boards, wobbly nosings—sort them with wood floor repairs and wood floor scratch repairs. If your floor hums like a drum, consider gap filling with resin or gap filling with strips. Old, tired parquet? Our old parquet flooring restoration team lives for that.

Step 1: Prep like a pro (this is 80% of success)
Sanding: match centre and edges
Start with a coarse cut to remove finish and flatten, then refine. A typical pine or oak sequence might be 40/60/80 in the main field with a belt sander, mirroring that with an edge sander (or even going one grit finer on edges to avoid “picture framing”). Your aim is a uniform scratch pattern—not a polished skating rink. If you need help, our wooden floor sanding and polishing service keeps everything level, including awkward corners and stairs via stair stripping & sanding.
Gap filling and repairs
Gaps let in draughts and spill varnish like a sponge. Use a compatible filler—resin mixed with fine dust for hairline gaps; strips for wider voids. See gap filling with strips and gap filling with resin. Loose boards? Squeaks? Knocks? Book wood floor renovation and repair.
Dust extraction and final clean
Think “surgery”, not “DIY shed.” Vacuum slowly, twice. Wipe down skirtings. Tack cloth the floor if required. The tiniest dust nib will show in a glossy hall at 10am Sunday when the sun finds it.
Shortcut: Book dust-free floor sanding and we’ll leave the surface immaculate, ready for sealing in our wood floor sand & seal system.

Step 2: Control your room climate
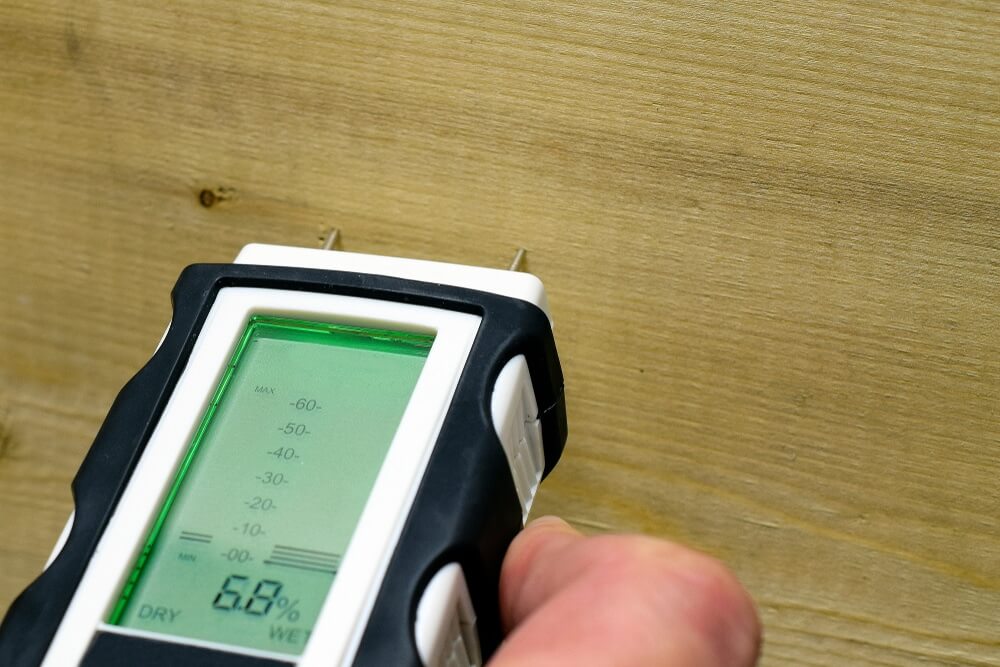
- Temperature: 18–22°C is the sweet spot. Too cold = slow cure and dust settling; too hot = flash-off, drag, lap marks.
- Humidity: Moderate and steady. Wild swings invite issues (white blush with some finishes).
- Airflow: Yes to gentle ventilation; no to direct drafts that skin the surface too quickly.
Tip: Switch off radiant heat under the floor during application and early cure. Use clean, filtered air—not a dusty fan blasting across your work.
If you battle noise through floors, before you refinish consider wood floor soundproofing or floor insulation fitting & sound proofing.
Step 3: Choose your varnish wisely
Most UK homes suit a water-borne polyurethane: low odour, fast recoat, tough, and available in extra matt, matt, satin, gloss. For kitchens and corridors, pick a 2-part high-traffic version. Want a little warmth? Oil-modified water-borne hybrids give gentle ambering; traditional solvent-borne warms more but brings higher VOCs and longer cure.
Unsure? Speak to us. We’ll match sheen and durability to the wood species—oak, maple, pine, parquet, or engineered. We even have a maple wood sanding & finishing process to prevent blotching.

Step 4: The application itself—slow is smooth, smooth is fast
Tools that make life easy
- Microfibre floor applicator or T-bar for wide, even coverage
- Quality varnish brush for cutting in (don’t skimp here)
- Short-nap microfibre roller (only if your product allows and the floor is dead flat)
- Paint tray/liner, pour-off bucket, and a clean spiked grid
- Head torch to catch lap marks and misses
Stir, don’t shake
Shaking traps air; air makes bubbles; bubbles make you cry.
Cut in, then pull the field
Start by cutting in around edges 3–4 boards wide. Then pull long, straight passes with the grain using your applicator. Keep a wet edge: overlap into the previous pass by a couple of inches, feathering lightly. If you see ridges or foam, you’re pushing too hard or too fast.
Thin is king
Two or three thin coats beat one gloopy one every day. Heavy coats trap solvent or water, skin over, and peel later.
If you’d rather not gamble, our varnish treatment service applies the correct film build for your species and traffic—no guesswork.

Step 5: Recoat timing and denibbing
Every manufacturer lists a recoat window. Hit it. Too soon and you get wrinkling; too late and coats don’t bond. Before the next coat, denib: a light pass with a fine abrasive screen or pad (think 150–180 grit), then a thorough vacuum and tack.
- Domestic floors: usually 3 coats of water-borne poly (matt/satin).
- High traffic / commercial: either a 2-part system or additional coat. For busy venues, see commercial floor sanding and commercial wood floor care services.
- Schools: tough, low-sheen systems are kinder on eyes and hide scuffs; ask about school floor maintenance.

Step 6: Cure, not just dry
“Dry to touch” is not “ready for rugs.” Follow three timeframes:
- Dry: dust-free and safe to tiptoe (often a few hours).
- Light use: next day in socks; furniture after 48–72 hours (lift, don’t drag—use felt pads).
- Full cure: typically 7–10 days for water-borne; longer for oil/solvent. No rugs or wet mopping until then.
While you wait, deal with heavy hearths or awkward protrusions properly—ask about hearth removal.
The quick checklist
- Floor flat, clean, dust-free
- Repairs and gap filling completed
- Right varnish chosen (traffic, sheen, species)
- Room at 18–22°C with steady, gentle airflow
- Tools clean: microfibre applicator / T-bar, quality brush
- Stirred, not shaken
- Cut in edges; long passes with the grain; wet edge maintained
- Thin coats; recoat window observed; denib between
- Respect cure times before rugs and heavy furniture
Need a hand? Book the lot with Sanding Wood Floors on 0800 955 0015.
The seven classic mistakes that cause all the drama
1) Rushing the prep
You wouldn’t varnish over crumbs on a dining table. Yet many do it to a floor. If your surface isn’t uniformly abraded, the finish highlights every swirl and edge halo. Our wood floor sand & seal process fixes this.
2) Using the wrong applicator
Long-pile rollers aerate the finish and leave orange peel. Use microfibre and a T-bar, and don’t overwork it.
3) Heavy coats (impatience in a tin)
Big, gloopy layers look wet-glossy—right until they skin, wrinkle, and peel. Thin coats bond; thick coats sulk.
4) Ignoring the recoat window
Too early = wrinkling. Too late = poor intercoat adhesion. Set timers. Make tea. Then coat.
5) Drafts and heaters
A heater pointed at your work? That’s a fast track to lap marks and drag. Keep the climate steady.
6) Contamination
Silicone spray, polish residues, even hand creams can fisheye your finish. Degrease suspect areas. If in doubt, speak to our floor finishes & seals specialists.
7) Skipping denibbing
A few seconds with a fine screen saves hours of regret. Denib, vacuum, tack—then coat.

Species notes (because wood has a personality)
- Oak: forgiving, takes water-borne well; tannins can react with some products—use recommended primers if specified.
- Pine / Softwood boards: softer; benefit from an extra coat and careful gap filling. See our floor restoration and gap filling.
- Maple: tight-grained and pale; easy to show lap marks; use the right applicator and maintain a wet edge. See maple wood sanding & finishing.
- Parquet: multiple grain directions—watch overlap lines. Our parquet floor sanding crew are masters here.
- Engineered: great candidates for refresh; mind veneer thickness. If you’re not sure, ask about our inspection as part of wood floor maintenance and care.
Special situations
Busy family kitchens and hallways
Go for a high-traffic, two-component water-borne system. It resists scuffs and stains better. If you want a richer look, an approved primer plus water-borne topcoats can mimic oil warmth without slow cures.
Commercial and education spaces
Choose low-sheen for fewer visible scuffs and glare. Plan phased works to keep you open. We’ll schedule around your hours with commercial wood floor care services and commercial floor sanding. For gyms and halls, talk to us about line-marking compatibility. For classrooms, see school floor maintenance.
Stairs and bannisters
Fiddly, time-consuming, easy to mark with drips. We handle them with stair & banister restoration services so they look as good as the floor.

Troubleshooting: fast fixes for common headaches
Bubbles
Cause: air from shaking, fast rolling, or a long-pile roller.
Fix: let the coat settle—light bubbles often self-level. If they dry in, denib and go thinner, slower, with microfibre.
Lap marks / tramlines
Cause: working across a drying edge; hot room; slow applicator.
Fix: maintain a wet edge, work in boards, shorten your sections, and reduce heat. Denib and recoat.
White blush or haze
Cause: moisture or cold conditions with some finishes.
Fix: stabilise room climate; allow full dry; sometimes a warm, gentle airflow helps. If severe, denib and recoat when conditions are right.
Peeling / poor adhesion
Cause: missed recoat window or contamination.
Fix: abrade thoroughly for a mechanical key; clean; recoat within window.
Dust nibs
Cause: poor extraction or cleaning between coats.
Fix: denib, then proper vacuum and tack. Consider professional dust-free floor sanding next time.
Aftercare that actually preserves your finish
You’ve done the hard work. Keep it looking new:
- Mats at doors, felt pads on furniture, soft-wheel castors
- No steam mops—ever.
- Neutral-pH cleaner, barely damp microfibre mop; spills up quickly
- Keep pets’ claws trimmed; lift, don’t drag
- Plan a simple wood floor maintenance and care visit annually for high-traffic homes
Thinking of a change later—new laminate in a back room to match levels? Our laminate flooring installation team can advise on transitions.

Why this works (and why most advice doesn’t)
A lot of online tips treat varnishing like painting a fence. Floors are different: big, flat, light-revealing planes you walk on daily. They show everything—good and bad. Our approach is boring on purpose. It removes luck from the process.
If your floor needs more than a quick tidy—uneven boards, rattling hearths, or Victorian pine that’s moved since the Blitz—call the specialists. From old parquet flooring restoration to hearth removal, we’ve seen it, fixed it, and finished it beautifully.
Ready to enjoy a flawless finish?
If you’re set to DIY, keep this page open and follow the checklist. If you’d like guaranteed results without stress, we’ll do the whole job—and we’ll do it cleanly, quickly, and to a standard you’ll show off.
- Book your varnish treatment
- Combine with wood floor sand & seal for a start-to-finish transformation
- Ask about floor finishes & seals to choose the perfect sheen
- Or simply call 0800 955 0015 and we’ll handle it
Quick note for engineered, parquet, and hardwood owners: if you’re not sure about veneer thickness, block stability, or species quirks, a short chat can save you a costly mistake. We’ll advise honestly—even if the right answer is “do nothing for now.” That’s why people stick with Sanding Wood Floors.

Frequently asked questions
How many coats do I need when applying varnish to wood floors?
Three thin coats is the norm for homes; high-traffic or commercial spaces may need an extra coat or a tougher 2-part system. We’ll recommend the right route under commercial floor sanding if you run a venue or business.
Can I use varnish over an oiled floor?
Not without the right prep. Oil can block adhesion. In many cases the old finish must be fully removed. Book wood floor renovation and repair and we’ll assess the safest approach.
What sheen hides the most wear?
Matt and satin are forgiving. Gloss shows everything but looks spectacular on perfectly flat floors.
Will varnish darken my floor?
Water-borne poly is almost clear; oil-modified warms slightly; solvent-borne warms more. Test a hidden area or ask our wooden floor finishing team for samples.
My floorboards are draughty—varnish will seal them, right?
Varnish isn’t a draught-proofing system. Use gap filling with resin for hairlines or gap filling with strips for larger gaps, and consider floor insulation fitting & sound proofing if your home is chilly.
Final word
People love shortcuts until they see the bill. The truth is, applying varnish to wood floors isn’t difficult—it’s disciplined. Follow the method above and you’ll have a floor that looks expensive because it isn’t ruined.
And if you’d rather have a team that’s done this thousands of times—without dust, fuss or weekend rows—ring 0800 955 0015. Or start here: