Revitalising History: The Art of Refinishing Old Parquet Floors
The old parquet floor underfoot is more than a mere structure; it is a whisper of yesteryear, harbouring tales of generations and the echo of countless footsteps. But as time wears on, these marvellous installations might lose their former lustre, with the beautiful mosaic of woods fading into the shadows of their past glory. However, all is not lost. The process of refinishing can breathe new life into old parquet floors, restoring their original splendour and adding a dash of modern finesse. In this comprehensive guide, we delve deep into the realm of parquet floor restoration, guiding you through the various steps and techniques involved in bringing your parquet flooring back to life.
In every home, there resides a heartbeat, a rhythm that echoes through its structures and installations, reverberating through the layers of time. Old parquet floors are living testimonies to this symphony, narrating tales spun from the golden fibres of history, elegance, and unrivalled craftsmanship. With their rich textures and intricate patterns, these floors have been silent witnesses to moments that defined generations. Yet, as the sands of time trickle away, these magnificent canvases of wood gradually surrender to wear and tear, their vibrant tales fading with the dulling hues and scuffs marking their surfaces. But fear not, for these age-old guardians of stories are far from narrating their last tale. Embarking on the journey of refinishing your old parquet floors is akin to turning back the pages of a beloved yet weathered book, rediscovering its beauty, and mending its tears, ready to tell its story once again to anyone willing to listen. Let us guide you through this transformative journey, where the old meets the new in a harmonious dance of restoration and rejuvenation.

Understanding Parquet Floors: A Brief History
Before delving into the refinishing process, it is essential to appreciate the rich history and craftsmanship behind parquet flooring.
Origins and Popularity
Originating in France in the late 17th century, parquet flooring quickly gained popularity for its intricate patterns and geometric designs. This flooring style became a hallmark of luxury and aristocracy, adorning the halls of various magnificent structures, including the Palace of Versailles.
Characteristics
Parquet floors are characterised by their unique geometric patterns, which are created by arranging small wooden pieces in a mosaic style. The grains and shades of different woods blend to create a harmonious yet visually striking floor surface.
Varieties
The designs can range from the simplistic and classic herringbone pattern to the more complex and intricate basket weave or chevron designs. Over the centuries, the artistry and craftsmanship involved in parquet flooring have evolved, offering a wide range of choices to modern homeowners.

Gathering the necessary tools and materials
Before you start with the refinishing process, gathering the essential tools and materials is a prerequisite.
Tools
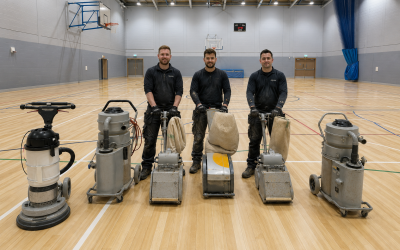
- Sanding Machine
- Edge Sander
- Hand Sander
- Vacuum Cleaner
- Paint brushes and rollers
- Safety Gear (masks, gloves, and goggles)
Materials
- Sandpaper (Various Grits)
- Wood Filler
- Stain (if desired)
- Polyurethane Finish

The Step-by-Step Guide to Refinishing Your Parquet Floors
Refinishing old parquet floors is a meticulous process that involves several steps. Here, we outline each stage in detail, providing a clear pathway to restoring your floor’s pristine beauty.
Step 1: Preparing the Floor
Removing Furniture and Fixtures
Begin by removing all furniture and fixtures from the room to create an open work space. This includes curtains, rugs, and any removable installations.
Cleaning the surface
Clean the floor surface thoroughly using a broom or vacuum cleaner to remove dust and debris.
Masking adjacent areas
To protect adjacent areas and fixtures, cover them with plastic sheets and secure them using painter’s tape.

Step 2: Sanding
Initial Sanding
Using a sanding machine, start the sanding process with coarse-grit sandpaper (around 20–36 grit) to remove the old finish and level the floor.
Edge Sanding
Employ an edge sander to reach the corners and edges where the larger sanding machine can’t access them.
Intermediate Sanding
Gradually move to medium-grit (50–80 grit) and then to fine-grit (100–120 grit) sandpaper to smooth the surface further.
Hand Sanding
For intricate patterns and hard-to-reach areas, use hand sanders to achieve a consistent finish.

Step 3: Gap Filling
Identifying Gaps
After sanding, identify gaps and crevices in the flooring that need filling.
Applying wood filler
Using a putty knife, apply wood filler to these gaps and smooth it out to level with the floor surface.
Step 4: Staining
Choosing the right stain
Select a stain that complements the original colour and grain of the wood.
Applying the stain
Using a paintbrush or roller, apply the stain evenly on the floor, following the grain pattern of the wood.

Step 5: Finishing
Choosing the right finish
Choose a polyurethane finish that provides the desired level of sheen and protection.
Applying the finish
Apply the finish using a paintbrush or roller, ensuring an even and smooth coat.
Sanding between coats
Between coats, lightly sand the floor using fine-grit sandpaper to ensure better adhesion of the next coat.

Step 6: Final Touches
Curing
Allow sufficient time for the finish to cure, usually 24 to 48 hours.
Cleaning
Once cured, clean the floor gently using a soft broom or mop.
Re-installing Fixtures
Re-install fixtures and furniture carefully, avoiding any scratches or damage to the newly finished floor.
Step 7: Maintenance
Regular Cleaning
Engage in regular cleaning to maintain the floor’s beauty.
Periodic Recoating
Depending on the traffic and usage, consider periodic recoating to protect the floor and prolong its lifespan.

Tips and Tricks for a Flawless Finish
Tip 1: Understanding the Grain
Understanding the wood grain and following its pattern during sanding and staining can yield better results.
Tip 2: Test Areas
Before applying stain and finish, test them on a small, inconspicuous area to ensure they provide the desired effect.
Tip 3: Adequate Ventilation
Ensure adequate ventilation during the refinishing process to avoid inhaling fumes and facilitate faster drying.
Tip 4: Professional Consultation
If in doubt, consult a professional for guidance and assistance to achieve a flawless refinishing.
Conclusion: Reclaiming the Glory of Your Parquet Floors
Refinishing old parquet floors is a labour of love steeped in history and craftsmanship. By following this comprehensive guide, you can reclaim the glory and beauty of your floors, blending the richness of the past with the finesse of the present. As you embark on this journey of restoration, remember that each step is a tribute to the skilled artisans of yesteryear, honouring their craftsmanship and adding a new chapter to the narrative that your parquet floor embodies.
Remember, a well-refinished parquet floor not only enhances the aesthetic appeal of your home but also significantly increases its value. So roll up your sleeves and breathe new life into your old parquet floors, ushering in an era of renewed splendour and grandeur.